With the winter months here and people doing mods I thought I’d share my installation method for the Loobman chain oiler for those who might receive one as a gift in the coming weeks. Now I am one of those who actually reads the directions/owners manuals but I gotta tell ya…. These instructions made no sense to be at all the first time through. I finally figured out the arrows and the ridiculous flow-chart style after reading them over and over for a week.

Geez…. I have seen better directions on Harbor Freight stuff but I digress.
I wanted to try this thing out but really needed to have an integrated look to the installation – Now I have been known to complicate a horseshoe and this project begs to be complicated. So I begin to scout possible locations for the freaking bottle.

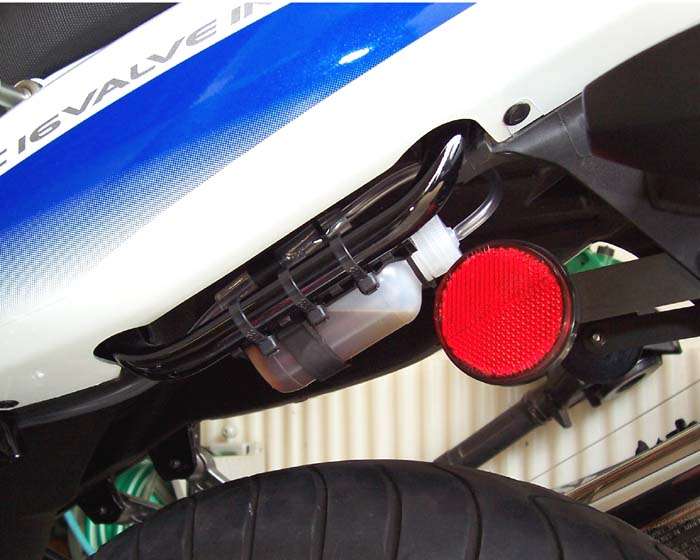
It takes up more space than you think and all the easy mounting spots just didn’t look right. I decided to use the under-seat grab bar to mount the bottle holder which got it out of sight and had the tubes going the proper direction. (Note to self – do not grab that bar when placing bike on centerstand)

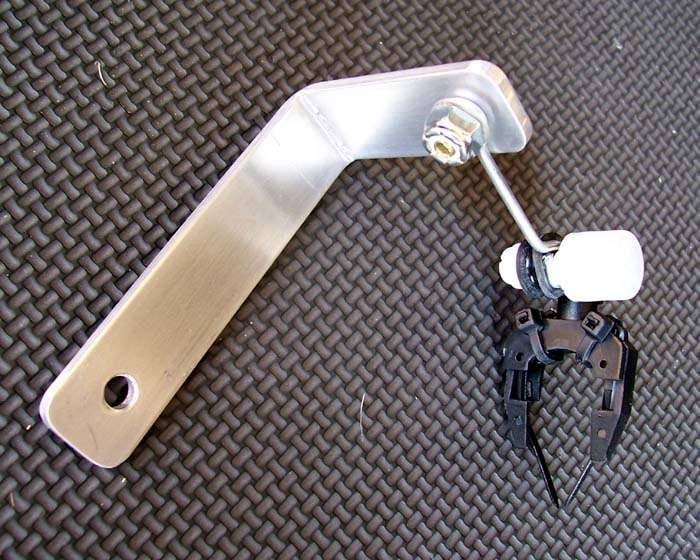
The next obstacle was mounting the delivery system. I had to pass on the supplied instruction methods although I briefly considered some sort of “under swing arm” arrangement. I figured that there should be a way to fabricate a bracket the attaches to the chain guard which would eliminate the tie-wraps. I had some 1/8” x 3/4” aluminum bar stock laying around - available from any home improvement center – and beat a 90 degree bend into it. Using the LAR method (looks about right) I drilled the hole to fasten the bracket to the chain guard. The other hole location was located in line with the sprocket when the bracket was clamped to the chain guard mount. A little sand paper and water….. baa daa bing!!! – brushed finish to match the swing arm.

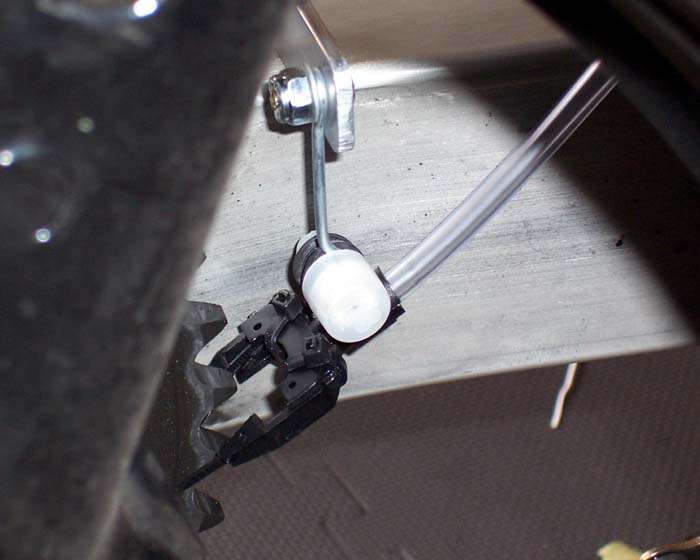
The wire mount that comes with the LoobMan has to be straightened and an eye bent into the other end at 90 degrees to the supplied eye bend. The overall length is not critical but the shorter the better. Mine ended up being about 1-1/2” from center-to-center. The delivery device and wire assembly was fastened to the bracket with Nylock nuts. The bracket attaches to the chain guard between the rubber grommet and mounting stud. This offsets the chain guard about 1/8” but not enough to cause problems. One very nice thing about this bracket is removal and re-installation is fast and easy. I rarely have to make any adjustments to the unit because it literally bolts in the same place everytime.
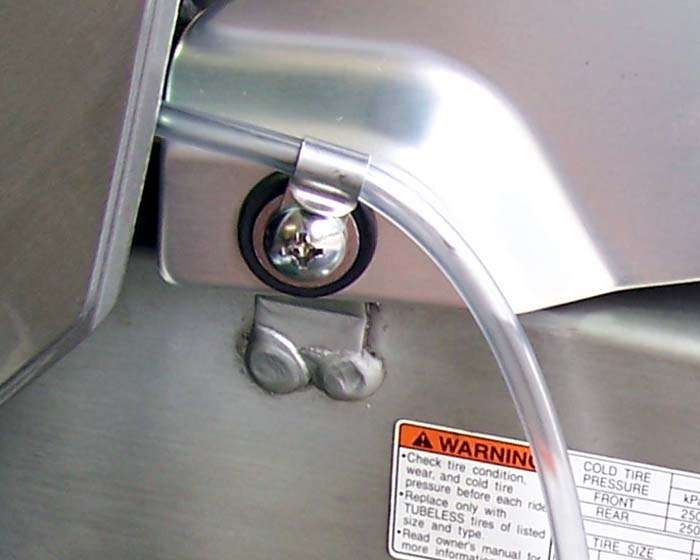
The final step was mounting the delivery tube and assuring a downhill run from bottle to sprocket. It would have been easy to just use tie wraps at this point but the brushed aluminum bracket went so well with the chain guard I wanted something to match. I found 1/4” coaxial cable clips made from aluminum which were almost ready made for this project. They are easily bent to obtain a friction fit without pinching the flow of oil. The clip on the front chain guard mount has to be cut and filed to make a spade type connector and slide between the head of the fastener and the washer. One other aluminum clip was used under the side cowling and these two keep things tight and out of the way of moving parts. I confess to using one tie wrap at the helmet lock but it can’t be seen unless you really hunt for it.

I have used this for several months now and based on my experience would recommend the following things. Don’t bother to use it for short trips of less than 50 – 100 miles unless you want to risk a puddle of oil under your chain/sprocket. Delivery rates are greatly affected by oil type and the amount you squeeze out of the bottle. It is much better to use a little oil more often than a lot once in a while. Lighter weights fling more and heavier weights take longer to dispense. I have tried 30 weight thru 90 weight oils and got vastly different results. I ended up with a 50/50 mix of 10w40 and 80/90 gear oil that seem to flow well with less fling. The Loobman makes chain lubing easy for long trips but otherwise I lube the chain “manually” every tank or so of gas. Some people report good results with transmission fluid but I have not tried this yet. On a scale of 1 to 10, I give the Loobman a 7.5 overall. You can’t beat the price and now you can’t beat the installation.

If you’re still reading this… here are some pictures of my installation for your viewing pleasure.
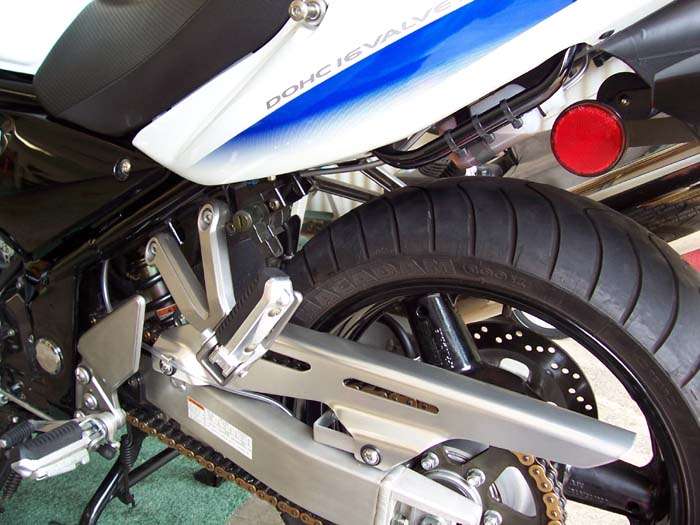
Overall Layout – Out of sight for the most part.
Bottle Detail – Bottle can’t be filled completely but there’s still plenty of lube.
Cable Clip – Another nice touch.
Bracket Assembly – Easily removable for servicing bike.
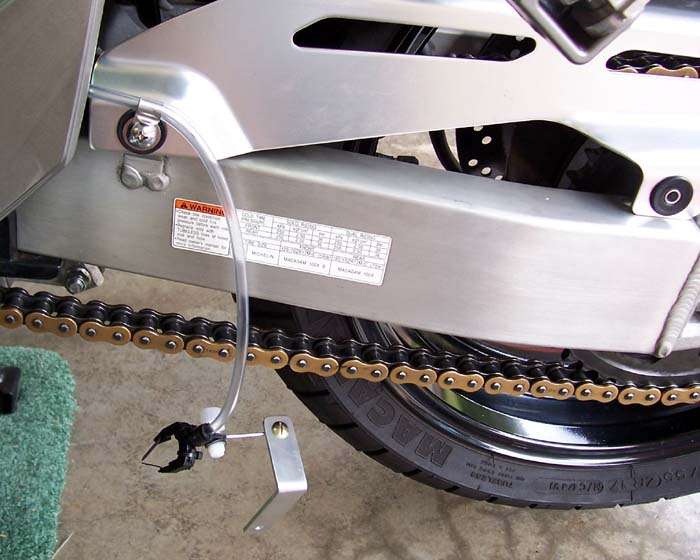
Bracket Assembly Detail – No heating required… just beat to fit!!!
Sprocket Close-up – Easy to adjust after mounting.

 Topic: Loobman Chain Oiler Installation (Read 11555 times)