Author Topic: Gouraami's 400 bandit project  (Read 47616 times)

Offline Gouraami

  • Board Homesteader!
  • ***
  • Posts: 147
Re: Gouraami's 400 bandit project
« Reply #45 on: October 26, 2015, 12:02:54 PM »
Thanks for the compliment regarding the paint  :thanks:

If it was on the side stand side I probably wouldn't have been as concerned. It won't be such a big deal to sort out, so I might as well do it.

The other issue I am sitting with in the previous side cover repair. Due to it being fibre glassed on the one side the cover still ends up cracking the paint on the other side when I flex it. I see the previous repair only has one layer of fibre glass, I am thinking about beefing it up with another two layers to limit the flex. Luckily it is at the bottom so you won't really see it when looking at the bike. The proper way of doing it would be to plastic weld, but I do not have the equipment to do it.
Project: Suzuki Bandit 400 Limited Edition, either a '90 or '91 needs a lot of TLC

Offline Gouraami

  • Board Homesteader!
  • ***
  • Posts: 147
Re: Gouraami's 400 bandit project
« Reply #46 on: November 04, 2015, 07:00:06 AM »
Sometimes it feels like I am never going to finish this project  :deadhorse:

I did what I mentioned I was thinking about in a previous post, beefed up the fibreglass on the side panels to limit flex, this will hopefully sort out my cracking issue. It does look like it has, I have bent and turned both panels with satisfactory results.

Before:


After:


Also got around to brazing the hole in the tank. While brazing something started burning inside, I will dig it out tonight, not really sure what it is. It looks like some type of material :

The fixed hole:


I also flatted all of the black sprayed items, busy prepping them for another 3 coats. I am not going to add any pictures, it simply looks like dull matt black paint. I have also been prepping the primed remaining things for their first 3 coats of black.

Eventually I got very tired of sanding. I had to switch over to something else as I was getting very frustrated, panel beating is not a fun job. I have a lot of respect for people who do this for a living. I switched over to the pilot settings on the carbs. Adjusted to firstly 2 turns, tested, and then 2.25 turns out. It is idling way better then before, but there is still a slight hesitation when blipping the throttle off idle. When I have a chance I will turn out the pilots to 2.5 turns and compare the difference.  Hopefully 2.5 turns will sort out the hesitation.  I also need to drop the needles down a notch...


« Last Edit: November 04, 2015, 07:02:29 AM by Gouraami »
Project: Suzuki Bandit 400 Limited Edition, either a '90 or '91 needs a lot of TLC

Offline Gouraami

  • Board Homesteader!
  • ***
  • Posts: 147
Re: Gouraami's 400 bandit project
« Reply #47 on: November 05, 2015, 08:48:42 AM »
I was very angry again last night  :annoy: :rant2: :banghead:

I should have never sent my panels off to be sprayed, their terrible job just keeps coming back to haunt me. I found a line which kept forming on the tank. I would sand it away, but once the tank stood in the sun it would come back. Last night I stood with the heat gun to see what happens when it gets warm. The line would instantly become bigger and if touched was soft. I started picking at it until a whole section broke off  :banghead: :banghead: :banghead: :banghead: . What was left behind was unset black paint!!! What this means is that they had dropped my tank twice! They then put filler over the black paint that wasn't set!! Below is the damage: (This is still the same tank, I have flatted it in the mean time, that is why the shine is gone)


I decided to get it back down to metal and fill at the same time, I didn't want to see it another day. I repaired the other dent as well, but the more I think of it, I am starting to think this dent was also caused by them.


This is the stuff I mentioned in yesterdays post that is inside the tank close to where the hole was. Whatever it is , it burns. I was able to remove this with an extended long nose pliers, but the rest I ended up burning off as I couldn't reach it. There is still some left but  I cannot get to it, I hope it doesn't react with the inner tank epoxy when I put it in.


Project: Suzuki Bandit 400 Limited Edition, either a '90 or '91 needs a lot of TLC

Offline ventYl

  • Board Homesteader!
  • ***
  • Posts: 249
Re: Gouraami's 400 bandit project
« Reply #48 on: November 05, 2015, 09:01:10 AM »
Seriously, all the precise prepairing and then they'll screw it up taking your money (i don't assume you'll get any refund). Don't you consider to buy hardware and try it on your own? Most probably you'll screw the paint for several times but after all you are learning it. You always know what and why went wrong and in turn what to do better so this will not happen again (as Elon Musk says: so next time something else may go wrong).
Bandit 400 1991 - stock except of swap from GK75B to GK75A

Offline Gouraami

  • Board Homesteader!
  • ***
  • Posts: 147
Re: Gouraami's 400 bandit project
« Reply #49 on: November 05, 2015, 09:19:41 AM »
I got a full refund, I insisted upon that. There was a lot of shouting and screaming when I went to collect my stuff   :rant2:

I have been doing the body work by myself since then, the black, primer and filler work in the previous pics is my work. I am redoing work now due to their previous bad work.

Project: Suzuki Bandit 400 Limited Edition, either a '90 or '91 needs a lot of TLC

Offline Gouraami

  • Board Homesteader!
  • ***
  • Posts: 147
Re: Gouraami's 400 bandit project
« Reply #50 on: November 16, 2015, 08:11:35 AM »
Update time.

Tank - In the mean time I have ended up redoing the front corner again  :annoy: It turns out there was more damage further past the repair I made. It only showed once the tank was in the sun. I have now learned that if I use a heat gun I can quickly see where there are problems. I am still finishing up, I am hoping the spray some primer today after work.
I have prepped the inside of the tank for the epoxy, I am hoping to pour it in on Wednesday after work. I am going to leave the tank in the sun for the next two days to ensure it is 100% dry inside.

Side Panels - These are proving to be complicated to repair. The issue is not the flexing it turns out. Every time the panels get hot from the sun the paint becomes soft and bubbles where the crack is. This is replicated when using a heat gun on it. I have come across a youtube video where lego (ABS plastic) is used to repair cracks in ABS plastic panels. I think I am going to give this a go. I should probably firstly see what the hardware has to offer then it comes to plastic repair...

Front Brakes: I ordered some braided hoses for the front as I simply couldn't get the front brakes to feel good without feeling spongy. I decided this was due to the 25 year old brake lines as I had bled the brakes many, many times without any air coming out.  There was some drama with my online order, but it is sorted out (Why can't I just get good service  :roll: ). The brakes are now only marginally better  :banghead:. I have tested the master cylinder by placing a bolt in the master cylinder instead of the banjo, it passes 100%, I can barely move the lever then.  I have never struggled like this to bleed brakes before! I have also tried tying the lever to the handlebar overnight, no luck. Once I have ridden the bike a bit I will try again, maybe there is air trapped somewhere and it needs a bit of vibration to move.

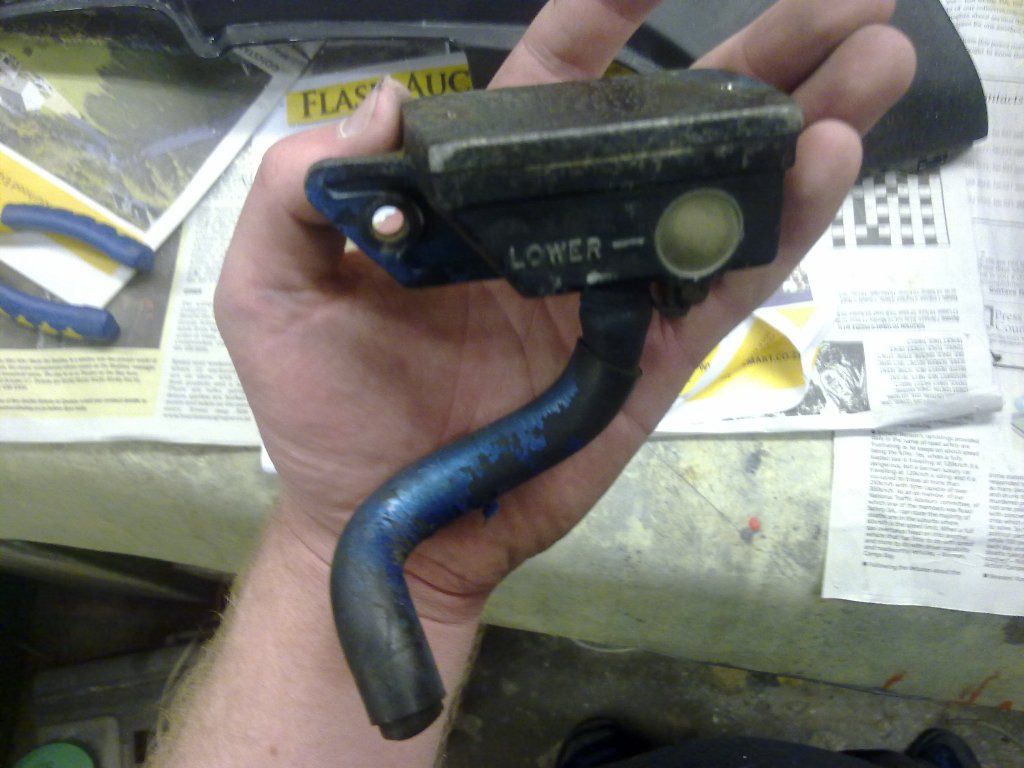
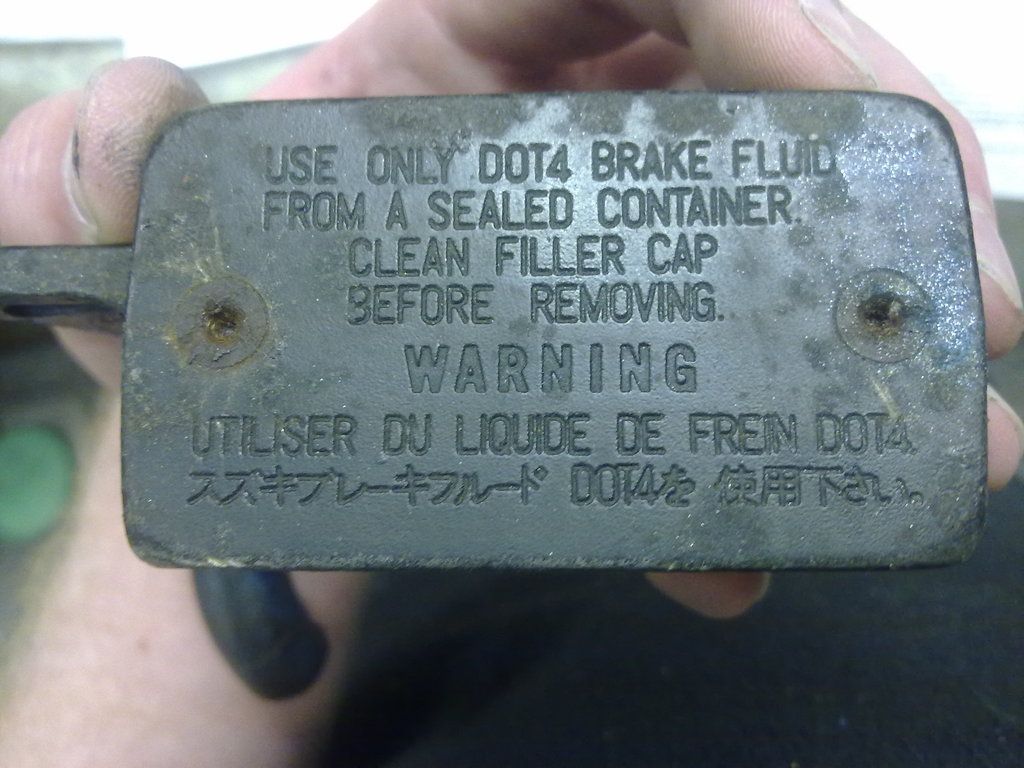
Back Brakes: I finally sourced a brake reservoir. After a long chat with the owner of the shop he ended up giving it to me for free  :bandit: I love free stuff! Once I took a look at it at home I saw why, I needed to get the blue paint off it + the screws where stripped. Once opened I ended up needing to clean out very old brake fluid that had dried on the inside. It is currently on the bike, I must still finish bleeding it properly.

There were two more 400 bandits standing at the bike shop (to be repaired, not for parts), both of their front brakes felt spongy like mine, so I don't have much hope of getting mine better.


While bleeding the back brakes I discovered the rear bleeding nipple was gone. I realised once there was brake fluid sprayed everywhere already  :stickpoke: 
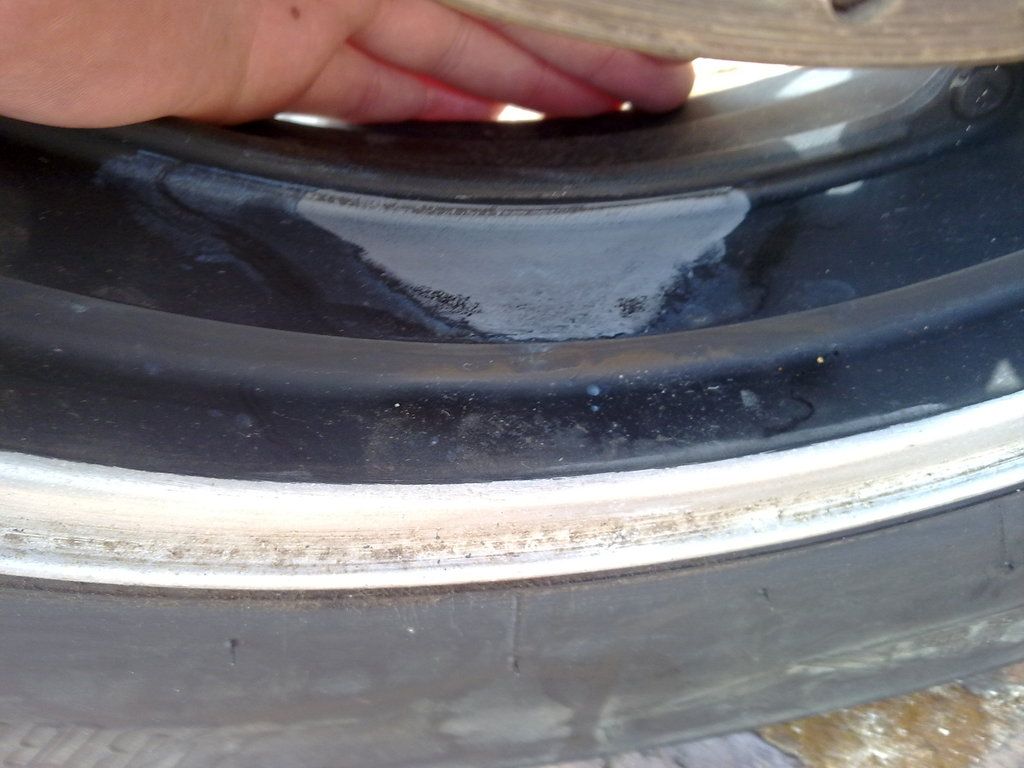
oops. The bike was on it's center stand at this point. It was getting late, so I decided to call it a night, I didn't have a spare nipple so there was nothing else I could do (I found one on Saturday and filled the system). I rinsed everything off and went to park the bike. The problem is that the bike parks on its side stand where it is stored. All the left over brake fluid inside the caliper dripped out while the bike was at an angle over night from where the bleeding nipple would go in  :banghead: :banghead: :banghead: :banghead: This is the aftermath:

It ate all the paint off the rim  :duh: A stupid mistake on my side.


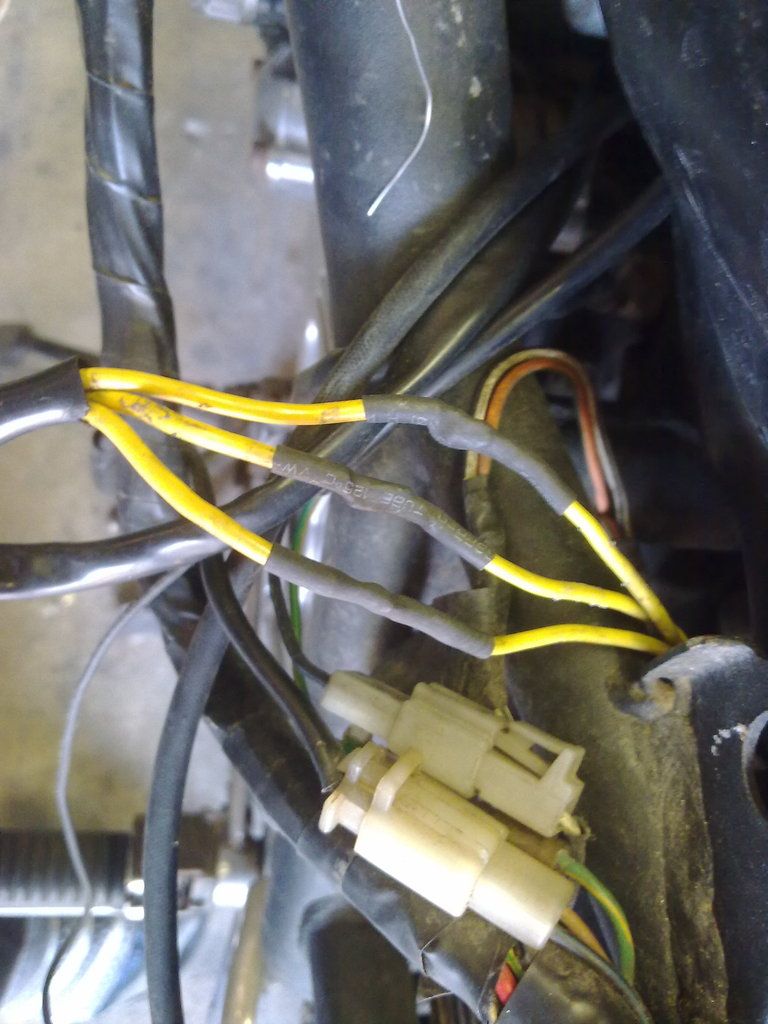
Electrics: There was a bad connection leading to the regulator at the point below. It would get so hot that the insulation would start melting (As you can see on the middle one, but all three would do it) I decided to solder the wires together instead of using crimp type connectors. You shouldn't be replacing a regulator often anyway. All sorted out now, the wires no longer get hot.


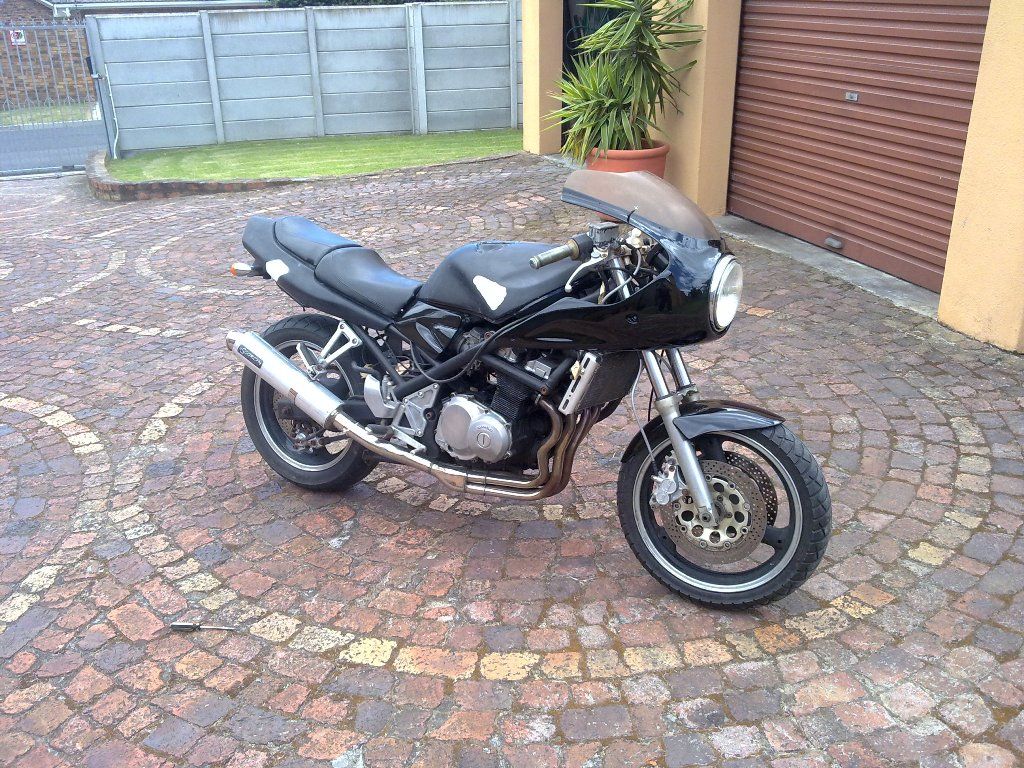
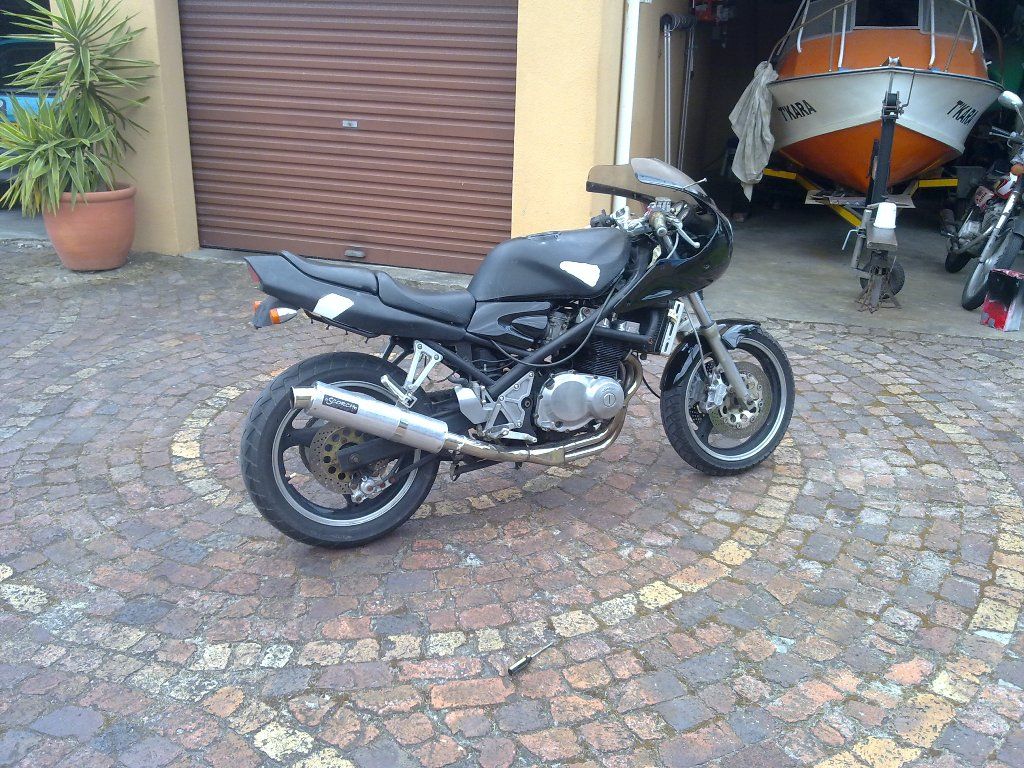
I wanted to see what the bike was going to look like in black, so temporarily placed the panels etc on. I made a good choice with the black  :thumb: I am very happy with it.


Project: Suzuki Bandit 400 Limited Edition, either a '90 or '91 needs a lot of TLC

Offline Gouraami

  • Board Homesteader!
  • ***
  • Posts: 147
Re: Gouraami's 400 bandit project
« Reply #51 on: November 16, 2015, 08:57:43 AM »
One more thing, I ended up playing with the Pilot screws again. Adjusted to 2.5 turns out. This doesn't work, it ends up fouling plugs. 2.25 turns is max, but it still hesitates off idle when grabbing some throttle indicating it is rich. The strange thing though is that it still does this even when running lean at 1.5 turns out. I am going to start at 1.75 turns out and try again when I have a chance. I am hoping 1.75 is a winner
Project: Suzuki Bandit 400 Limited Edition, either a '90 or '91 needs a lot of TLC

Offline Squishy

  • Board Homesteader!
  • ***
  • Posts: 417
Re: Gouraami's 400 bandit project
« Reply #52 on: November 16, 2015, 09:01:44 AM »
Wow that front fairing look sexy as hell  :yikes: I didn't know it would look so good on the 400! Also I realize how much better dual front discs look... :stickpoke:

Anyway about bleeding the brakes... Once you have pressure, try pumping the lever like you normally do when bleeding, but this time open all the banjo bolts instead of opening the nipple - sometimes there's air stuck in the banjo and you will never have a solid lever.

On the mixture screw, I've found 2x out is the best for my 400 with slip-on exhaust.

Offline Gouraami

  • Board Homesteader!
  • ***
  • Posts: 147
Re: Gouraami's 400 bandit project
« Reply #53 on: November 16, 2015, 09:18:58 AM »
, but this time open all the banjo bolts instead of opening the nipple

Now that is a bloody good idea!!  :thumb: I am definitely going to give that a try

I jumped directly from  1.5 turns to 2, so that is why I want to give 1.75 a try

That fairing has been flatted again, so it is all dull, I want to spray the final 3 coats some time this week
Project: Suzuki Bandit 400 Limited Edition, either a '90 or '91 needs a lot of TLC

Offline ventYl

  • Board Homesteader!
  • ***
  • Posts: 249
Re: Gouraami's 400 bandit project
« Reply #54 on: November 16, 2015, 01:26:39 PM »
What is your air filter / carbs / exhaust setup? I see that your exhaust is not stock but dunno if it is fully open or not. You might need to do some fiddling with carb parts due to changed air lines. That small displacement engine is probably very prone for this to be set up properly. I have another output headers with straight pipe type exhaust from K1 GSX-R 1000 and the bike screams for huge adjustment when I mount it. It is simply rich as hell making VW-like black smoke when accelerating. Do you have your carbs ballanced? IMHO unballanced carbs will make bike hesitating when off-idle wide opening the throttle than pilot screws. The screws are mostly felt when engine is under load.
Bandit 400 1991 - stock except of swap from GK75B to GK75A

Offline Gouraami

  • Board Homesteader!
  • ***
  • Posts: 147
Re: Gouraami's 400 bandit project
« Reply #55 on: November 17, 2015, 06:54:11 AM »
Hey ventYl

Currently a very dirty air filter on the inlet side and the end pipe is fully open (and very noisy). I did balance the carbs around 2 months ago, but it didn't correct the hesitation off idle. I will give balancing another go and see what happens
Project: Suzuki Bandit 400 Limited Edition, either a '90 or '91 needs a lot of TLC

Offline Squishy

  • Board Homesteader!
  • ***
  • Posts: 417
Re: Gouraami's 400 bandit project
« Reply #56 on: November 17, 2015, 07:20:30 AM »
Hey ventYl

Currently a very dirty air filter on the inlet side and the end pipe is fully open (and very noisy). I did balance the carbs around 2 months ago, but it didn't correct the hesitation off idle. I will give balancing another go and see what happens
On my current setup (2x mixture out), without DB-killer in the exhaust, there was always a slight hesitation when pulling away slowly. It wasn't bad though, but I had to noticeable give more throttle to pull away. On more aggressive throttle no problems.
With DB-killer, it's much better. I've also found it's way smoother and more constant on idle. With open can, it would almost sound like it had an offset firing order. A valve adjustment did make that much better, but still it might be something to consider.

Offline Gouraami

  • Board Homesteader!
  • ***
  • Posts: 147
Re: Gouraami's 400 bandit project
« Reply #57 on: November 17, 2015, 07:54:20 AM »
That sounds like what I am experiencing, including the pulling away.

I will fiddle with the pilots and balancing and see how good I can get it while taking your experience in consideration  :thumb: Thanks
Project: Suzuki Bandit 400 Limited Edition, either a '90 or '91 needs a lot of TLC

Offline Squishy

  • Board Homesteader!
  • ***
  • Posts: 417
Re: Gouraami's 400 bandit project
« Reply #58 on: November 17, 2015, 08:00:00 AM »
That sounds like what I am experiencing, including the pulling away.

I will fiddle with the pilots and balancing and see how good I can get it while taking your experience in consideration  :thumb: Thanks
If you don't want to use a DB-killer, be sure to pick up #110 mikuni main jet and put the needle on +1 rich. You'll be amazed what this engine can do.   :bandit:

Offline Gouraami

  • Board Homesteader!
  • ***
  • Posts: 147
Re: Gouraami's 400 bandit project
« Reply #59 on: November 17, 2015, 08:06:21 AM »
Thanks for the advice Squishy, I am not sure if it is going to pass roadworthy with the current "silencer" on, it really is very loud,  I might have to change it temporarily till the bike is in my name.

I should take a picture of the silencer...

The needle is currently on +1 rich, I just need to order some main jets!  :motorsmile: You can never go wrong with a bit more power
Project: Suzuki Bandit 400 Limited Edition, either a '90 or '91 needs a lot of TLC