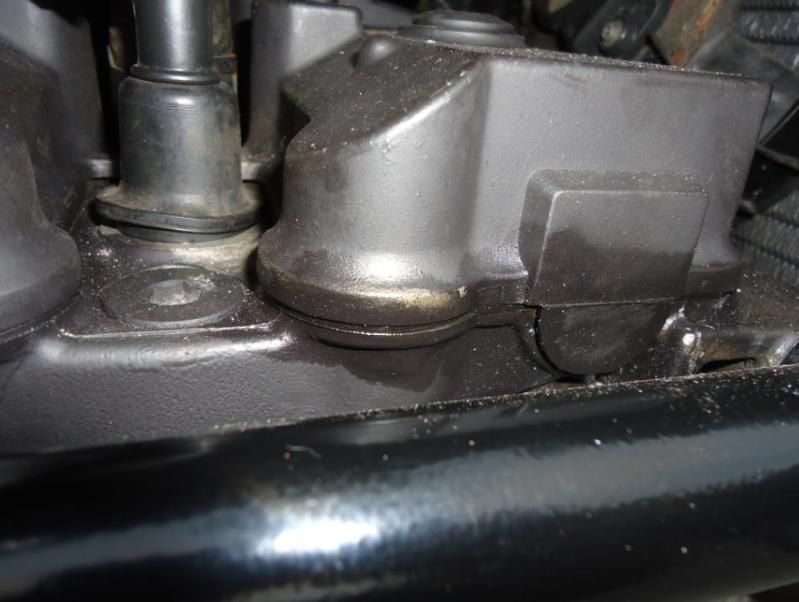
So after finding a small leak on my valve cover, it was about time to renew the gasket...
so whilst the cover was off i decided to check (and adjust) the valve clearances so thought i'd put a few photos up of the process if anyone's in the same boat and wants to save some cash and do it themselves ;)
First got everything out of the way.. found it necessary to remove the bottom HT leads from the coils.. made it easier getting it back in..
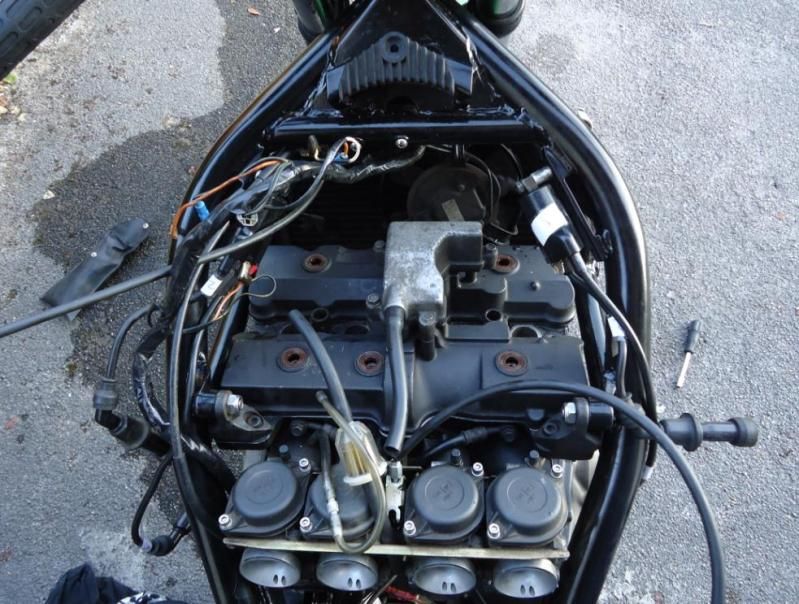
bolts out and its off
next bit is to line up the cams... now i read up on the job before going ahead with it to refresh my memory - i'd only ever done it on my 600 before now, but guessed it'd e pretty much the same stuff... (it was :) )
only thing was i didnt want to take the side casing off, as its had a fresh oil change and i didn't have a replacement gasket for the side... so found an easier way!

spark plugs out so you're not fighting compression, put her into 6th gear, clutch out, and push her forward until the cam marks are in the right place

no oil to mess with, no gasket to replace! sweet...
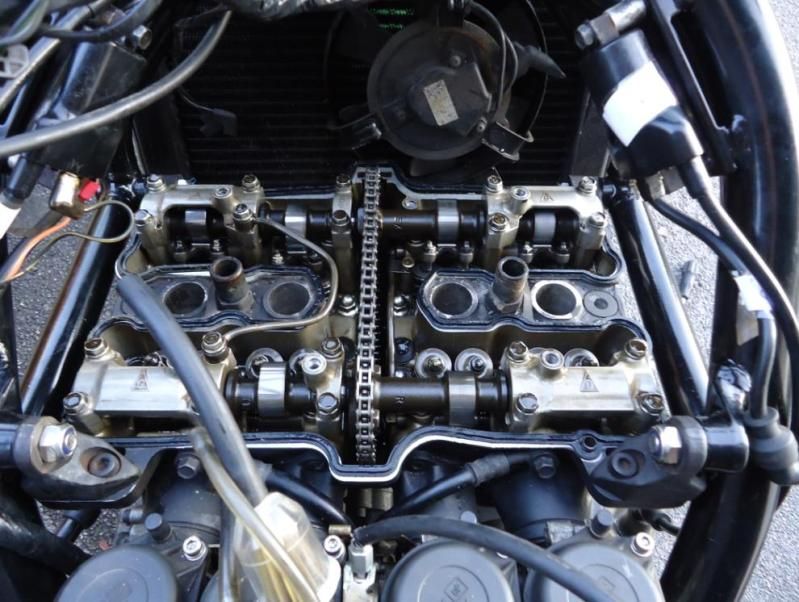
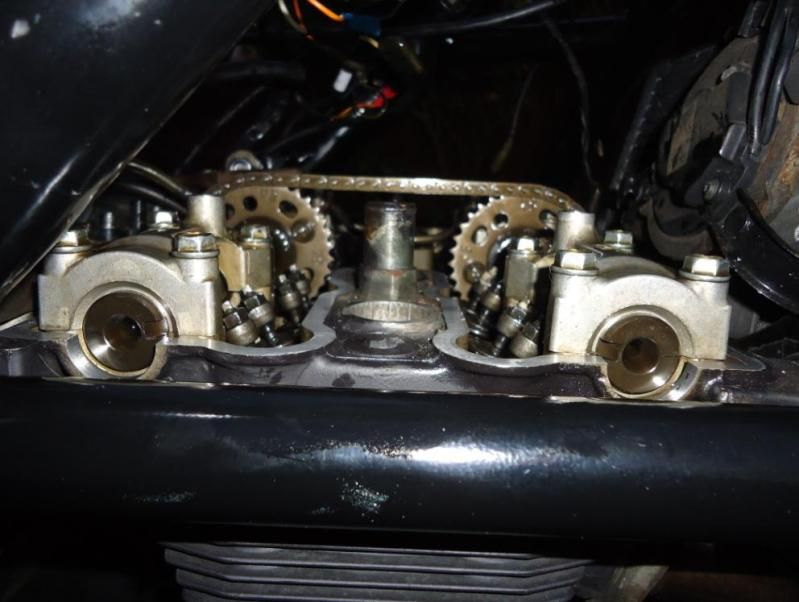
the cam marks look like:
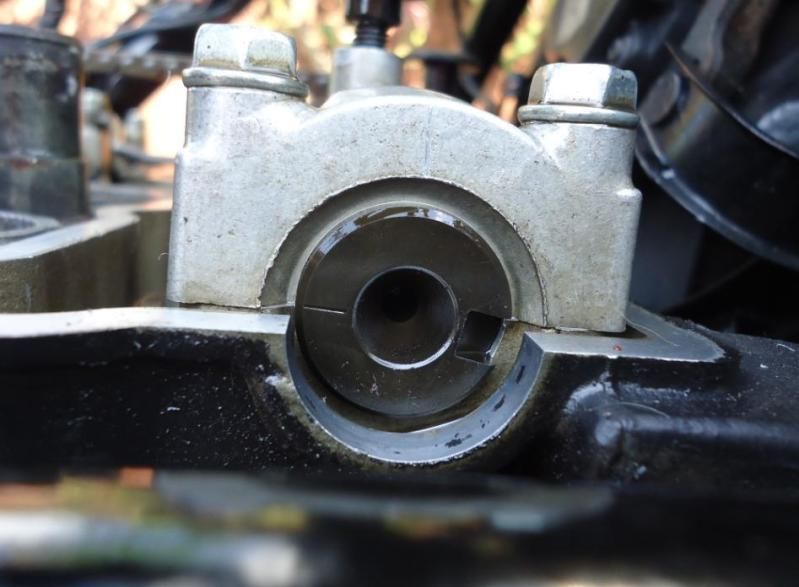
1st stage you want the cams to be looking like:

with the cams like this you can check:
#1 inlet and exhaust
#2 exhaust
#3 inlet
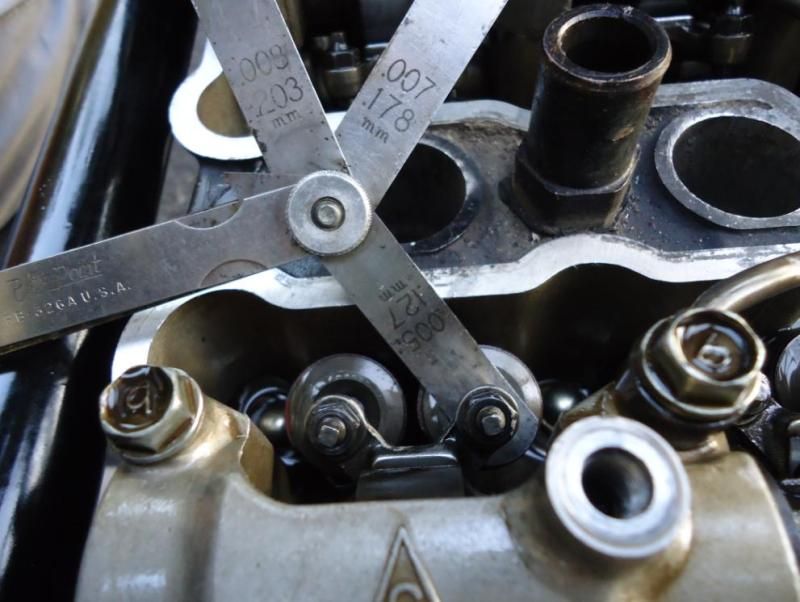
if its too tight then undo the locking nut - 8mm spanner, and then you can move the tappet with your fingers till the feeler gauge just fits.
inlet valves should have 0.10-0.15mm of clearance
exhaust should have 0.15-0.20mm of clearance
since i was using fingers, i used 0.127mm and 0.178mm respectively..
once they're done, push the bike forward again until the cams look like:
and do the same check on
#2 inlet
#3 exhaust
#4 inlet and exhaust
i had to adjust both on number 4, and two others on 1 and 2.. 3 was ok though...
put the new cover gasket on with rtv sealer to hold it to the lid whilst placing it.. had a bit of trouble with getting it to stay put even with that stuff, so make sure its sitting on the cylinder head correctly before you put everything else back on... then double check it... as you might miss a small inch long part like i did and have the oil piss out when you start her up....

managed to sort it without too much disassembly thankfully and now no leaks!
so i'm pretty glad i decided to check whilst i was under there and not be lazy like i was tempted.....
hope that's all of some use to someone on here :) nice easy job... just a little time consuming is the only down side..
Andy

 Topic: Valve Clearances (Read 2944 times)