Author Topic: Painting/restoring parts.  (Read 8357 times)

Offline BanditAllan

  • Board Homesteader!
  • ***
  • Posts: 56
Painting/restoring parts.
« on: November 21, 2013, 11:58:31 PM »
Here are some photos showing whats possible when restoring parts for used bikes you've bought. Bear in mind these parts were either on a bike I bought used, or came from Ebay.


Some Ebay mirrors after removing scratches from the stainless round mirror sections and then polishing them and the shafts.


Used indicator body before.


Same body after restoration


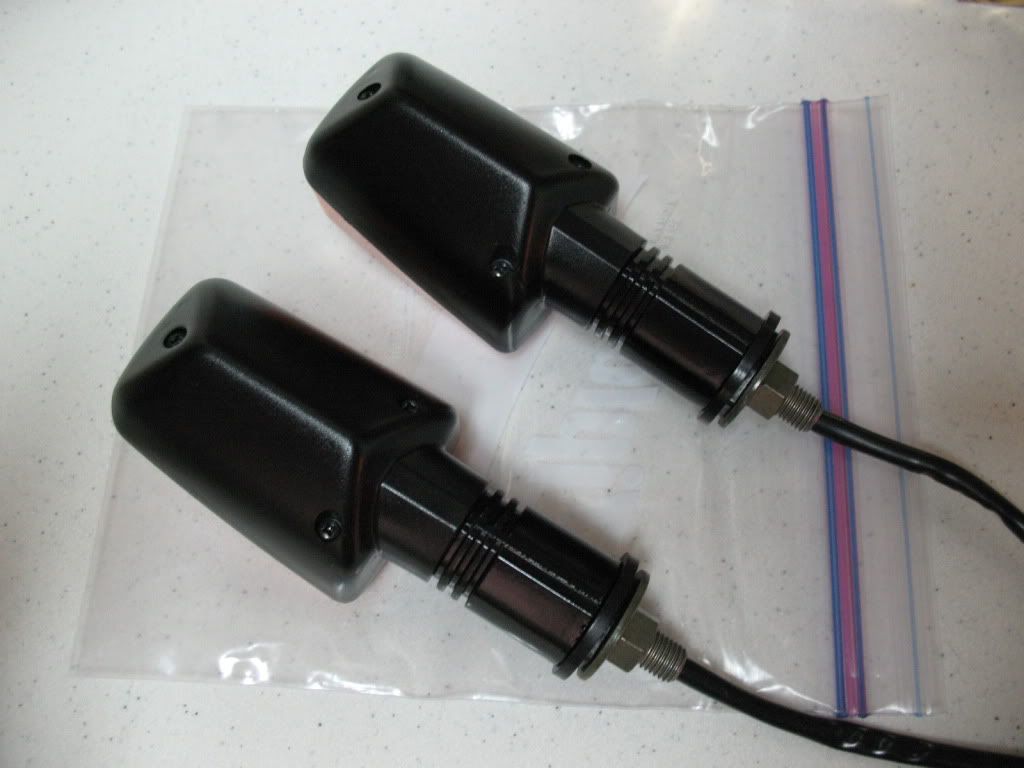
All assembled, since there is nothing in a matte dark gray on the Bandit, I opted for a semi black look on the indicators instead.

One of the rear footrest brackets, these are a little bit of work to do but they come out great when you take time. I media blast of the old corroded paint and clear, then clean off all the sharp edges and file any casting issues smooth. Then they go in the media blast cabinet again to texture where the work was done.
I then put back in the brushed finish on the face and paint the whole bracket in auto paint. Once its dry I wipe away the paint from the brushed section and apply auto clear coat. To finish up the job I cut and apply 3M protective tape to the brushed finish section to prevent scuffing from shoes/boots etc.


RH bracket now restored


Close up of painted area to the brushed finish section.


It takes a while to get the paint off the mesh but once done in the blast media cabinet, re painting is very easy.


Some other parts restored ready to be fitted to one of the Bandits


I had the sump off, soooo, well why not spruce it up.


A pile of used Bandit parts waiting to be restored.

Offline andrewsw

  • Board Homesteader!
  • ***
  • Posts: 598
Re: Painting/restoring parts.
« Reply #1 on: November 23, 2013, 11:59:59 AM »
 :clap:

nice work! I wish I had the time and equipment to do this, but daily commuting on my bandit, and lack of equipment keeps me from tackling this sort of work. Maybe someday. Meantime, it looks like crap and people leave it alone ;)

A

Offline BanditAllan

  • Board Homesteader!
  • ***
  • Posts: 56
Re: Painting/restoring parts.
« Reply #2 on: November 24, 2013, 12:14:21 AM »
Yes,I agree, having a daily rider that has 'patina' making it look like a pos, is a blessing in disguise. If I used one bike solely for daily rider duty I'd probably disguise it to look like yours does at present to reduce it being stolen.
I bought the tools and did this work because I am restoring the three Bandits I have, along with a few other bikes I'm also restoring.

You would be surprised how minimal it cost to buy the tools to do this sort of work. Basically a blast media cabinet, decent sized compressor and a paint gun.
Naturally being able to spray paint and two pack clear well helps a lot.
I'm always up for a decent challenge, and for example if I tell you the paint gun I painted those parts with in the photos only cost me $14.00, yes thats right fourteen dollars, you would possibly think I'm yanking your chain.


Offline LowRyter

  • Site Supporters
  • Board Homesteader!
  • ***
  • Posts: 578
Re: Painting/restoring parts.
« Reply #3 on: November 24, 2013, 01:42:03 PM »
wow.  Those parts look better than new.  I never cared for the round stock mirrors tho.
John L

1998 Red Suzuki GSF-1200S
1998 Red & Cream Moto Guzzi V11 EV
2001 Greenie Moto Guzzi V11 Sport

Offline BanditAllan

  • Board Homesteader!
  • ***
  • Posts: 56
Re: Painting/restoring parts.
« Reply #4 on: November 24, 2013, 05:20:54 PM »
Thanks for the comment John, I like the OEM round mirrors with the dampers a lot, as they are a high quality item and I've yet to find anything better. Maybe you have something in mind as a decent replacement, if so let me know.

Offline LowRyter

  • Site Supporters
  • Board Homesteader!
  • ***
  • Posts: 578
Re: Painting/restoring parts.
« Reply #5 on: November 24, 2013, 07:57:30 PM »
Allen, I took the mirrors from my Moto Guzzi V11 Sport.  They're black cat's eye types.

They don't work on the Guzzi any better than the Bandit mirrors work on the Bandit.  WHen I purchased the Sport the orginal owner converted the clip-ons to handle bars and put on lane spltter bar end mirrors on it.  The Guzzi mirrors are taller and wider look better than the OEM Bandit mirrors IMO. 

http://www.moto-science.com/product/moto-guzzi-v7-v11-sport-original-stock-matte-black-cup-mirror-160102

BTW- I've changed the bars on the Bandit and gone with gold Renthal aluminum.  They look good (even better with these mirrors) and are little more comfy than stock.
John L

1998 Red Suzuki GSF-1200S
1998 Red & Cream Moto Guzzi V11 EV
2001 Greenie Moto Guzzi V11 Sport

Offline BanditAllan

  • Board Homesteader!
  • ***
  • Posts: 56
Re: Painting/restoring parts.
« Reply #6 on: November 24, 2013, 09:30:52 PM »
I'm surprised you say the Bandit mirrors don't work well for you, I find them to be more than adequate for width and overall rearward vision. If I was to change them, the new mirrors would have to be either round again or rectangular, I say rectangular as the headlamp and indicators are that general shape on a MK1 Bandit so they would all generally blend in.

I looked at doing something different with the handlebars, I'm running flatter than stock Super sport chrome bars but they are quite cheap and flimsy since most are made in Taiwan etc.
So after looking around a bit I wanted something in an aluminum alloy with a bigger mount area. So far I've ended up getting some pro taper yolks which I've stripped the ugly black off of and will be painting them to match the paint I've used on the upper triple tree.

I need to make some minor alterations to the stock tapered mounting dampers that sit in the top tree for the Pro taper mount bolts to pass through. I got the ones with a slight offset so there's a choice of slightly forwards of the mounting bolts or slightly behind them if you rotate the yolks 180 degrees.
See the link http://www.protaper.com/products/triple-clamps/bar-mounts/universal-rubber-mounts.
The next issue will be to sift through the bars to find a bend I like and the choice of platinum or silver for the colour.
I also like the stock Suzuki bar ends so I suspect I'll have to alter the ID of the bars for the rubber sleeves to get in there.
One issue usually creates more, but its always good to get what you want once you cover all the issues.
Once I've got one Bandit how I like it there's a small dilemma, I have two more to do. Happiness does come in threes,LOLOL

Offline LowRyter

  • Site Supporters
  • Board Homesteader!
  • ***
  • Posts: 578
Re: Painting/restoring parts.
« Reply #7 on: November 24, 2013, 09:34:25 PM »
three Bandits?  It would be fun to turn one into a cafe racer.
John L

1998 Red Suzuki GSF-1200S
1998 Red & Cream Moto Guzzi V11 EV
2001 Greenie Moto Guzzi V11 Sport

Offline BanditAllan

  • Board Homesteader!
  • ***
  • Posts: 56
Re: Painting/restoring parts.
« Reply #8 on: November 24, 2013, 10:04:45 PM »
A few more bits and pieces from my restoration files for my Bandits. Some may think this strange but I find painting very relaxing, UNTIL something lands in the clear coat,, :yikes:


For the discoloured seat plate I media blasted it then used metallic gold paint. These are usually in gold passive plating so I kept the colour close enough. I also tossed the zinc washers for these ones I made up out of stainless steel.


Some restored front fork lower tubes with 3M armour tape on the leading edges. I used a colour on all the silver parts thats very pleasing to the eyes and while not stock it has a bit more depth to its flake.


A photo showing the general condition of the left engine cover and the Suzuki engine guard when I got this Bandit back in 08

The same engine guard restored and now painted and clear coated in a colour like the engine cases. The lighting has it looking black but its not,,, nice shine too.

To save that cover in the photo,I had to grind off the damaged Suzuki lettering and a bit of the round section to remove the gouges and make it smooth.
This is how it looked after the repair work and media blasting,,,, paintwork was next.

Offline BanditAllan

  • Board Homesteader!
  • ***
  • Posts: 56
Re: Painting/restoring parts.
« Reply #9 on: November 24, 2013, 11:05:26 PM »
Actually, I don't want to do a cafe racer to a Bandit, I plan for something more extreme while still retaining the sleeper look. The last Bandit is actually a bike I'm building 100% out of parts bought from Ebay.
Its a really long story but it all started with a frame I located for $80.00. Basically after that came a seat, then tank, then slowly over a few months the bike grew to a pile of parts which I started restoring.
As those parts were restored they went onto Florida Bandit, then Florida Bandits parts were restored and went onto Calgary Bandit. Calgary Bandits parts were then restored for project Sleeper Bandit which lies in boxes waiting for me to start engine work on that bike.
Recently I finally got the last major parts, the body plastic. It took forever but I found a complete set of unrashed and all tabs intact panels for around $100.00. Now to begin the prepping and final colour choice but its on hold for now as I have other parts in restoration for other bikes I'm working on.

Offline LowRyter

  • Site Supporters
  • Board Homesteader!
  • ***
  • Posts: 578
Re: Painting/restoring parts.
« Reply #10 on: November 25, 2013, 01:54:15 AM »
if you want to match the stock engine paint:  PJ 1 Suzuki Gray
John L

1998 Red Suzuki GSF-1200S
1998 Red & Cream Moto Guzzi V11 EV
2001 Greenie Moto Guzzi V11 Sport

Offline BanditAllan

  • Board Homesteader!
  • ***
  • Posts: 56
Re: Painting/restoring parts.
« Reply #11 on: November 25, 2013, 02:41:31 PM »
I simply went to the auto paint store and worked with the tech there to create the correct engine colour using an engine cover to test on, between us in about a few minutes we had it down pat.
The process was helped along by the fact both he and I come from the 'old school' where we had to manually tint base colours back in the 70s and 80s.

Colorite sell most of the paints as well but the prices per pint or quart are quite steep. For the regular silver and met grays its not a big deal to create them if you know what you are doing. However, for 22U candy academy maroon I'd buy the Colorite simply because candy paint has been known to make grown men cry trying to get the effect correct by tinting it to spec.

Offline LowRyter

  • Site Supporters
  • Board Homesteader!
  • ***
  • Posts: 578
Re: Painting/restoring parts.
« Reply #12 on: November 25, 2013, 02:46:59 PM »
My local body man repainted most of B12 Candy Apple red after I'd crashed on Push Mtn.  It's close, he had the original paint and didn't like it, too blue, CAR is a little bit gold.  It's a close match.  He did a great job taking the dent out of the tank and the painting SUKUZI on the tank because the decals floated in the clear coat.
John L

1998 Red Suzuki GSF-1200S
1998 Red & Cream Moto Guzzi V11 EV
2001 Greenie Moto Guzzi V11 Sport

Offline Calaviator

  • First Post! Be Gentle!
  • *
  • Posts: 1
Re: Painting/restoring parts.
« Reply #13 on: December 16, 2013, 03:12:23 AM »
Excellent work! can you shed some light on your process for the plastic parts?  Tackling that soon :)

Offline BanditAllan

  • Board Homesteader!
  • ***
  • Posts: 56
Re: Painting/restoring parts.
« Reply #14 on: December 16, 2013, 03:20:16 PM »
For plastic you need to clean the parts properly to remove any grease residue first. If you have gouges or rashed sections you will need to fill those areas with a flexible putty made for plastic and let it cure. Once you are ready to begin sanding use a grit of paper for the required task and always use it wet. #600 or #800 to start and going up to #1500 or #2000 to make sure all the surface issues are removed and the finished surface is scratch free and smooth.
When the piece is ready for paint you will need to apply some plastic adhesion primer first, which is clear and is usually put on on in two thin coats. Once the adhesion primer is dry you can lightly sand it with some #2500 dry and then apply your paint and top coats
I've discussed the basics here but you need to be aware of how the plastic is behaving as you work on it and take your time.